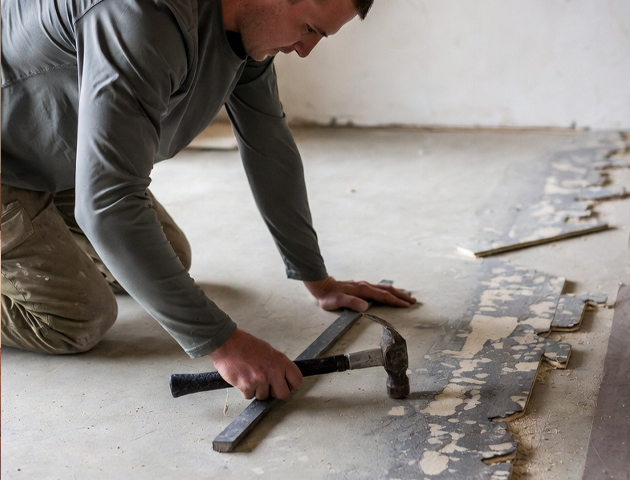
Beautiful hardwood flooring doesn’t start with the first plank — it starts with preparation. One of the biggest differences between a floor that lasts decades and one that develops problems early is what happens before installation begins.
For homeowners in climates like Chicago and nearby communities such as Orland Park, moisture control isn’t optional — it’s essential. Seasonal humidity swings, concrete slabs, crawl spaces, and construction moisture can all influence how hardwood performs.
The good news is that most moisture-related flooring problems are preventable when proper job site preparation is taken seriously. This guide walks homeowners through what professional installers evaluate, why moisture testing matters, and how preparation protects your investment.
Why Preparation Matters More Than Most Homeowners Realize
Hardwood flooring is a precision installation. Wood naturally expands and contracts in response to environmental conditions. If flooring is installed into a space that isn’t ready — too humid, too dry, or still releasing construction moisture — the wood will adjust after installation instead of before.
That adjustment can lead to:
Visible gaps between boards
Cupping or crowning
Surface stress
Buckling in extreme cases
None of these are installation goals — they’re symptoms of rushed preparation.
Professional installers view job site readiness as the foundation of success. Skipping or shortening preparation may save time upfront, but it dramatically increases the risk of future problems.
Establishing “Normal Living Conditions”
Before hardwood flooring ever enters the home, the structure should reflect the conditions it will experience long-term.
This includes:
Doors and windows installed
Exterior sealed
HVAC systems operating
Interior temperature stabilized
Humidity within a livable range
Why is this important? Because wood adjusts to its environment. If flooring is installed while drywall is drying, paint is curing, or construction moisture is evaporating, the wood absorbs that excess humidity — only to shrink later when conditions normalize.
Professional installers typically recommend that climate controls run for at least 48 hours before flooring delivery, allowing the interior environment to stabilize.
For homeowners, this step ensures the floor adapts to real-life living conditions — not temporary construction extremes.
The Role of Moisture Testing
Visual inspection alone cannot determine whether a subfloor or slab is ready for hardwood. Moisture testing provides measurable confirmation.
Professionals test three critical areas:
Moisture meters measure the moisture content of plywood or OSB subfloors. Readings should fall within acceptable ranges and closely match the flooring material.
Concrete continues to release moisture long after it appears dry. Specialized testing methods evaluate vapor emissions to confirm readiness.
Delivered flooring is tested to ensure compatibility with the job site environment.
When moisture levels differ too greatly, installation pauses. This protects both the flooring and the homeowner.
Skipping testing is one of the most common causes of post-installation movement issues — and it’s entirely avoidable with proper preparation.
Concrete Slabs: Hidden Moisture Risks
Concrete often looks dry long before it truly is. Even months after pouring, slabs may emit moisture vapor.
If hardwood is installed prematurely:
Vapor migrates upward
Boards absorb moisture
Expansion stress develops
Professional installers use accepted testing methods to confirm that vapor emissions fall within safe limits. Even when concrete tests within range, moisture barriers are still used as an added layer of protection.
For Chicago-area homes — where ground moisture and seasonal humidity fluctuate — this step is especially important.
Wood Subfloors: Balancing Moisture Levels
Wood subfloors also carry moisture that must align with the hardwood being installed.
A large moisture difference between subfloor and flooring increases the likelihood of movement. Professionals measure multiple areas and average readings to verify compatibility.
If conditions aren’t ideal, additional time or environmental control may be required before proceeding.
This careful approach prevents flooring stress that could otherwise appear weeks or months later.
Moisture Barriers and Vapor Retarders
Even when testing confirms acceptable moisture levels, vapor can still move over time. Moisture barriers act as insurance against future environmental changes.
Depending on the structure, installers may use:
Polyethylene film over concrete
Roofing felt between subfloor and flooring
Adhesive-compatible vapor barriers
These materials regulate vapor transfer without trapping harmful moisture.
For homeowners, barriers are invisible once the floor is installed — but they play a major role in long-term stability.
Avoiding the Rush: A Common Industry Pitfall
Many flooring problems originate from tight construction timelines. Builders or homeowners eager to finish a project sometimes pressure installers to proceed before conditions are ready.
The consequences can include:
Cupped planks
Buckled sections
Costly replacement
Experienced flooring professionals know that waiting for proper conditions is not a delay — it’s protection.
A floor installed under the right conditions rarely surprises homeowners later.
Wide Plank Flooring Requires Extra Attention
Wider boards are popular for their modern appearance, but they naturally respond more noticeably to moisture changes.
Preparation becomes even more critical:
Accurate moisture matching
Proper fastening schedules
Environmental stabilization
When done correctly, wide plank floors perform beautifully. When rushed, movement becomes more visible.
Professional preparation ensures aesthetic goals don’t compromise performance.
Chicago Climate Considerations
Midwestern homes experience dramatic seasonal humidity shifts:
Winter
Heating systems dry indoor air, encouraging slight wood contraction.
Summer
Humidity rises, allowing wood to expand naturally.
Proper job site preparation anticipates these cycles by installing flooring into balanced conditions — not extremes.
Maintaining indoor humidity between roughly 35%–55% year-round supports both flooring health and household comfort.
What Homeowners Can Do Before Installation
Preparation isn’t only the installer’s responsibility. Homeowners can help by:
Running HVAC systems consistently
Avoiding last-minute wet construction work
Ensuring crawl spaces are dry and ventilated
Addressing leaks before installation
These steps create an environment where hardwood can perform as intended.
The Value of Professional Standards
Proper preparation requires training, experience, and discipline. Professional installers follow established guidelines that prioritize moisture awareness, environmental readiness, and long-term performance.
When preparation is done right:
Flooring settles naturally
Seasonal changes remain minimal
Structural integrity is preserved
The result is a floor that behaves predictably — and beautifully — for years.
Start Your Project the Right Way
Hardwood flooring is an investment in your home’s comfort and value. Proper job site preparation ensures that investment performs as intended from day one.
The team at Top Hardwood Flooring works with homeowners throughout Chicago, Orland Park, and surrounding communities to evaluate site conditions, control moisture, and install flooring designed for Midwest living.
If you’re planning a hardwood project, expert preparation is the first step toward lasting results. Reach out to schedule a consultation and ensure your home is ready for installation.